• Home
  • About Me
  • Holidays
    • April Fools
    • Birthdays
    • Christmas
    • Easter
    • Halloween
    • St. Patrick’s Day
    • Thanksgiving
    • Valentines Day
    • Summer
    • Fall
    • Winter
  • Get Organized
    • The Household Organization Diet
    • Cleaning
  • Project Gallery
    • Crafts
    • Design and Decor
    • Recipes
    • Fun for Kids
  • Home Tour
  • Shop My Favorites
  • Contact Me

Clean and Scentsible

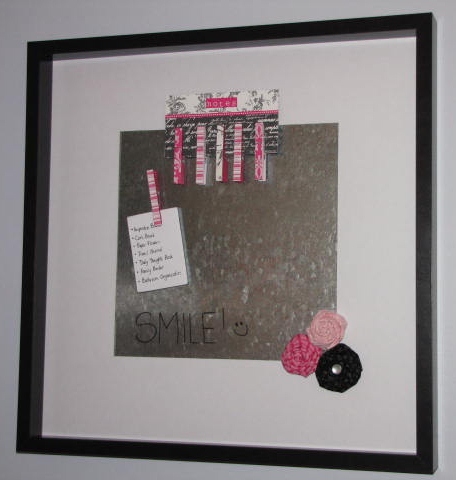
Quick and Easy Magnetic/Dry Erase Board

  • Share
  • Tweet
Hi everyone!  For those of you with kiddies off school this week, I hope you are enjoying your Spring Break!  We are having a “Screen-Time Free” Spring Break here so I probably do not have long before the kids figure out where I am and drag me off to play!When I purchased my metal sheeting for my magnetic calendar, I picked up a few extras with no real plans for what to do with them.  I knew they would come in handy some day though! 

I wanted some kind of note board for the craft room and love how these sheets can function as both dry erase and magnet boards.  The sheets are cut in 12×12 sections so it was a little small for the space that it needed to cover.  I was thinking of putting the two of them together but just happened to find the perfect frame this weekend while shopping at Ikea.
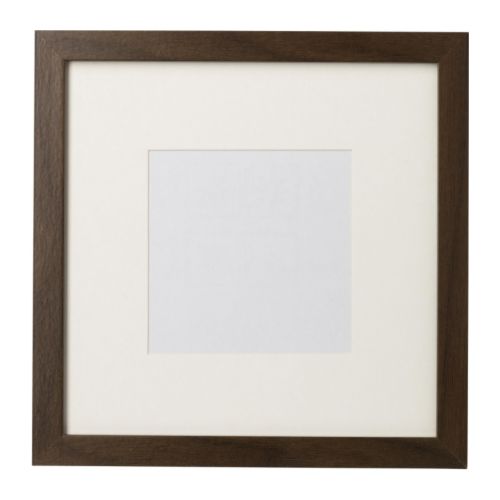
It is one of their Ribba frames and was $19.99 {only $17.99 if you live in the US!} I loved the large matting around it and the picture actually sits recessed in the frame so it adds some great dimension.  And the opening was 11 3/4 x 11 3/4. 
I put the matting in front of the glass and adhered the metal sheet to the glass with some Command strips.  You could just attach the sheet to the backing and remove the glass but I wanted to keep the glass around in case I use it for something else later.   
I added some rolled flowers to one of the corners:
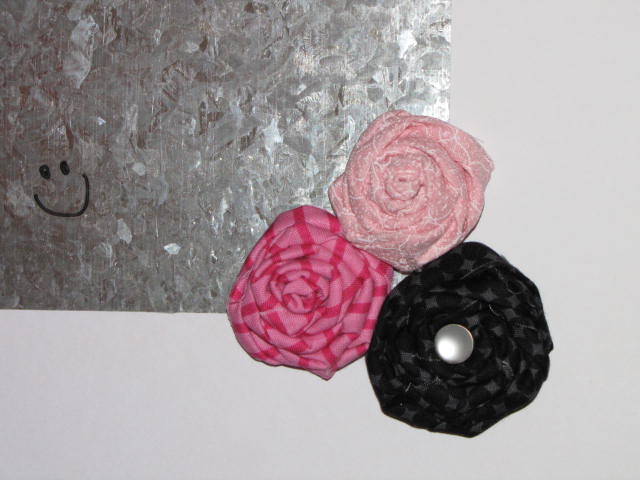
{If you are looking for a tutorial on how to make these, the best one I have come across is this video clip from Freckled Laundry}
And some magentic clothes pegs to hold my notes:
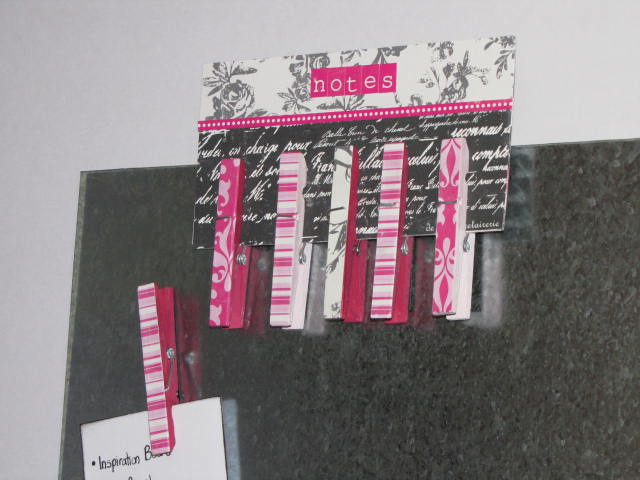
{tutorial can be found here}
The ledge on the frame is perfect for stroring a dry erase marker and a little notepad.
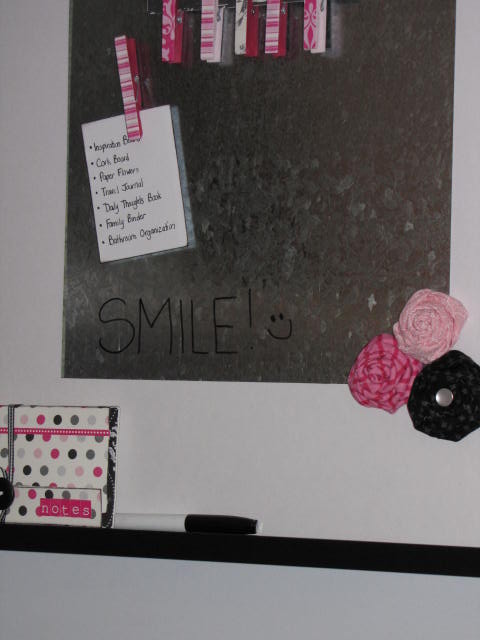
So now I have one magnet board in my craft room:
and the other sheet up on the fridge {don’t you love the little vinyl elephant?}
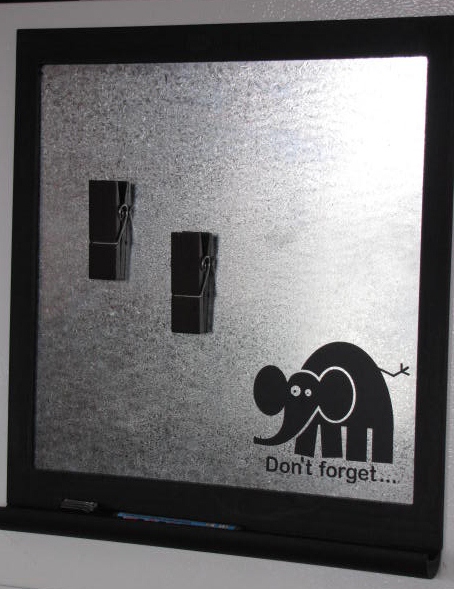
Now the kids and I are off to play with Shrinky Dinks!  Have a good day!
I have linked up with Young and Crafty, Somewhat Simple, Blue Cricket Design, Running with Glitter, Tip Junkie, Today’s Creative Blog, Skip To My Lou, Sew Chatty, The Girl Creative, Craft-O-Maniac, The DIY Showoff, Under the Table and Dreaming, I Heart Naptime,  Funky Junk Interiors, Be Different Act Normal, Tatertots and Jello, Whipperberry,  Fingerprints on the Fridge, Tidy Mom, The Shabby Nest, Paisley Passions, House of Hepworths, Delightful Order, Passionately Artistic, Night Owl Crafting, Lil Luna, Blue Cricket Design, A Beach Cottage, This Blessed Nest and Sugar Bee Craft Edition.

Subscribe

« How to Stencil a Wall
Craft Day {Flower Tacks and a Subway Sign} »

Comments

  1. Emily says

    March 22, 2011 at 9:07 pm

    I always love the things you make and this one falls into that category. 🙂

    Reply
  2. Whatitsallabout... says

    March 23, 2011 at 1:01 am

    That looks awesome! Genius idea!

    Reply
  3. Josh & Jamie Beutler says

    March 23, 2011 at 12:32 pm

    Oh my goodness! I love this!! This idea is soooo much better than my post it collage that is currently in my craft room! Thank you so much for sharing 🙂

    Reply
  4. this blessed nest says

    March 23, 2011 at 8:03 pm

    this is so smart & efficent! what a great idea you had. those colorful clothespin are adorable as well.

    thanks for linking up to the SPRING FLING!

    kellie

    Reply
  5. Sue@creativetryals.blogspot.com says

    March 23, 2011 at 11:50 pm

    Oh yeah – love the elephant. On the to do list now.
    Thanks for sharing!

    Reply
  6. Marian says

    March 24, 2011 at 11:42 am

    Love the way the metal sheeting looks! So cute and modern.

    Reply
  7. Rebecca @ My Girlish Whims says

    March 24, 2011 at 1:18 pm

    this is so cute! i love the pink clothes pins 🙂

    Reply
  8. Angie@Echoes of Laughter says

    March 24, 2011 at 8:20 pm

    I love this…especially the pink! I love the clothes pins…I need to make some of those pins for new frame I just picked up yesterday! Angie xo

    Reply
  9. Kelly says

    March 29, 2011 at 3:25 am

    Great idea!!!
    I’d love it if you would
    link up over at the glitter party! http://runwithglitter.blogspot.com/2011/03/weekly-tues-thurs-link-party.html

    Reply
  10. The DIY Show Off says

    March 30, 2011 at 12:34 pm

    Jen – these are adorable! What a clever EASY idea and so fun too! Love it!

    Roeshel

    Reply
  11. KT says

    June 30, 2013 at 4:10 pm

    Can you write directly on the sheet metal with the dry erase? I’m thinking of replacing one of the white boards (that is just a shower board and not magnetic) with a piece of sheet metal if I can find one large enough. I was wondering if it would still function as a white board if I did.

    Reply

Leave a Reply Cancel reply

Your email address will not be published. Required fields are marked *

Recipe Rating


This site uses Akismet to reduce spam. Learn how your comment data is processed.

Put Your House on a Diet

The Home Organization Diet. Put your home on a diet for a clutter-free, happy, and healthy home!

Meet Jenn

Hi there! I'm Jenn, mommy to two busy {and very cute!} boys and wife to a very tolerant hubby. I love all things crafty and creative and have created this blog to share my ideas and favorite finds. I hope you enjoy your visit! Read More…

Connect with me

  • Facebook
  • Instagram
  • Pinterest
  • Twitter

Subscribe

Get all our latest posts directly to your inbox

Looking for Something?

Categories

Archives

Subscribe

Latest from Instagram

[instagram-feed num=9 cols=9 showheader=false showbutton=false showfollow=false]

Copyright © 2026 · Clean and Scentsible LLC · All Rights Reserved · Privacy Policy