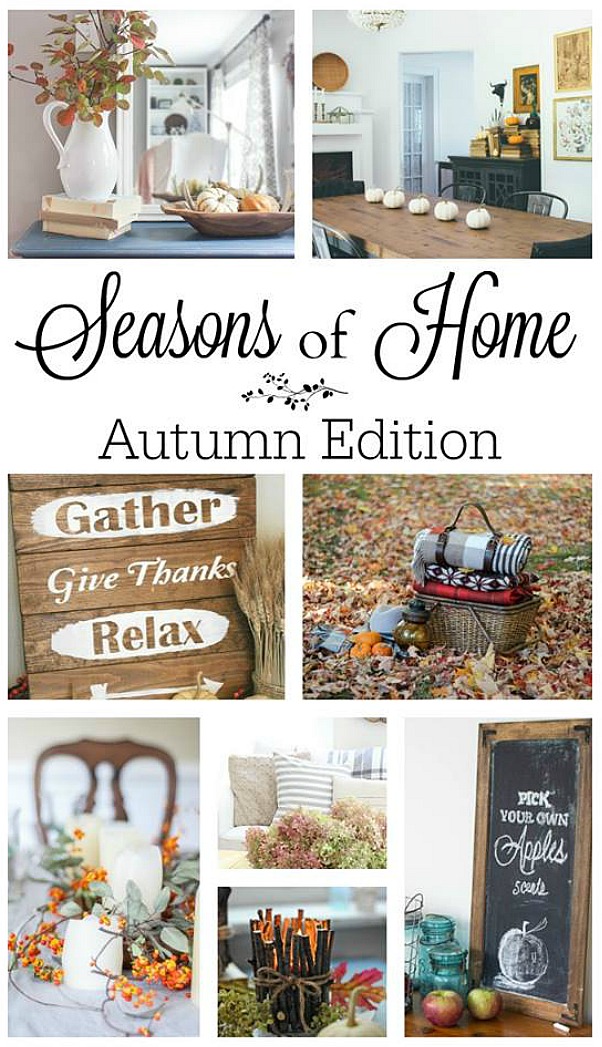
Today, I am joining some of my favorite bloggers for the Autumn edition of our Seasons of Home Blog Hop. As always, we are sharing some beautiful fall decor and project ideas to help inspire you for the season.
 You can find all of the links for the above projects at the end of the post, so don’t forget to check them out! I’ll start off though with this easy rustic Thanksgiving sign…
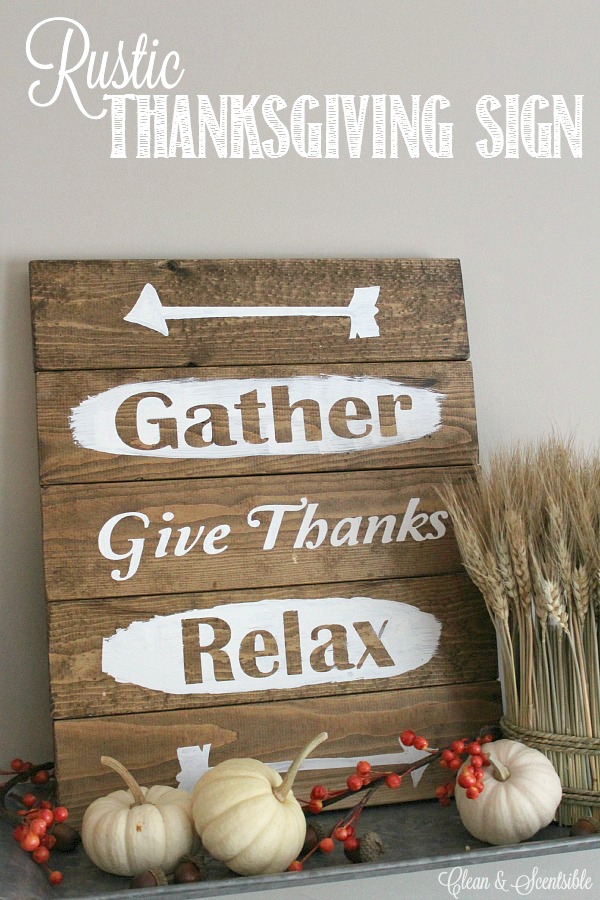
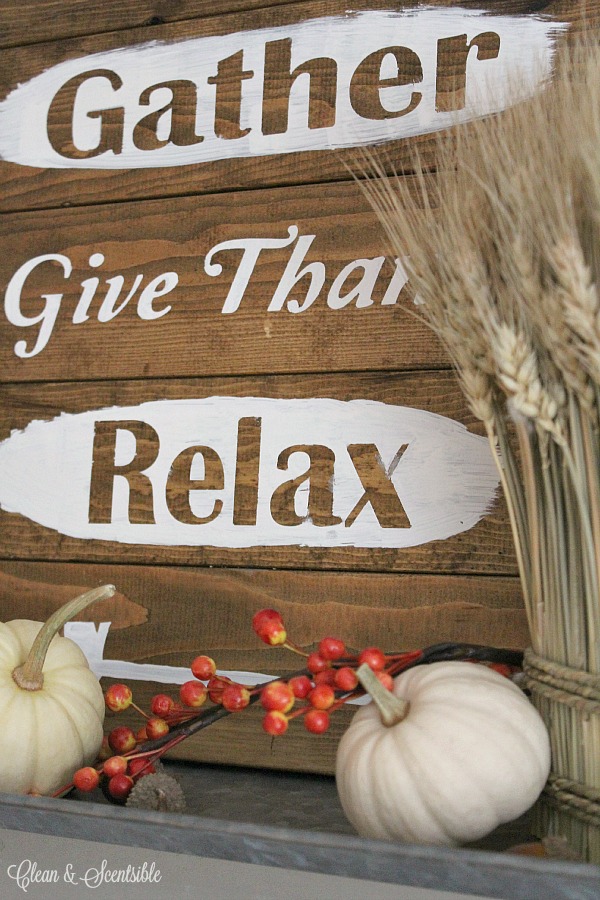
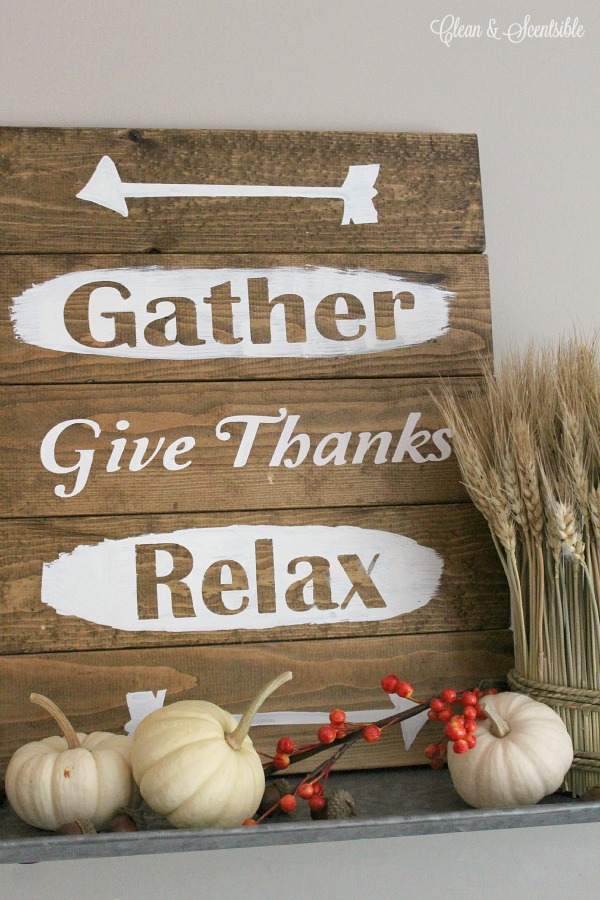
We just celebrated our Canadian Thanksgiving this weekend, but the sign would work well for any fall decor. I saw a similar sign in one of our local stores, and knew that it would be the perfect fit. It’s easy to make and only took about an hour of work time {with a few breaks for drying!}.
MATERIALS
- 5 1 x4 boards cut to size {mine was about 14 inches}
- wood screws
- 2 wooden garden stakes {or 1×2 boards} cut down to just slightly smaller than the height of your sign {to adhere the boards to}
- stain {I used a dark walnut}
- white paint
- foam brush
- stencils {I used my Silhouette machine for this project}
- sanding block
DIRECTIONS
- Sand the wood boards if needed. In addition to smoothing them out, I like to round off the edges as well so they are not so harsh. Stain the boards and allow to dry.
- Prepare your stencils. I used a combination of the positive image {like the Relax and Gather} and the negative image {like the Give Thanks and the arrows}. Press your stencils firmly down in place completely sealing up the edges.
- When using the stencils, don’t load up your brush too much with paint. It is best to apply it in thin, multiple coats if needed. Especially for the negative image stencils, be sure to use a dabbing motion when applying the paint rather than using actual brush strokes as this will help to prevent bleeding of the paint under your stencil.
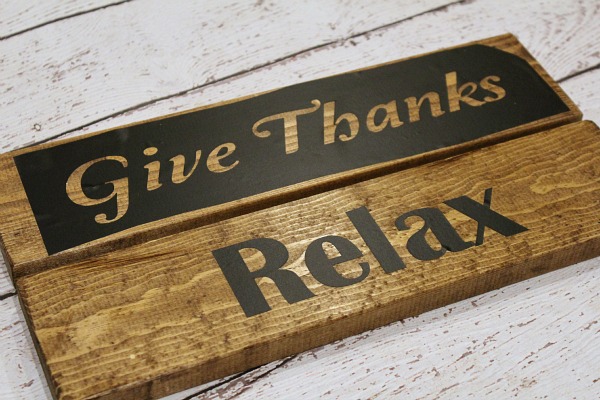
- For the positive image stencils, brush your paint right over the stencil, tapering off on either end.
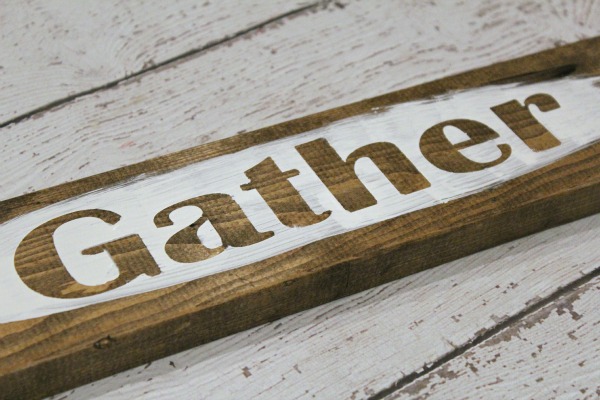
- Remove the stencil while the paint is still wet. I find that they are easier to remove using tweezers – especially when using the positive image. Allow the paint to dry.
- Once the paint is dry, it is time to assemble your sign. I like to assemble it last rather than assembling it prior to painting, just in case I make a mistake when painting. You can always just flip a board over and no one will see!
- To assemble, lay your boards out in the correct order face side down and use the garden stakes as cross strips on either side of the boards to attach each of your boards to. To prevent splitting, it’s best to pre-drill the holes before using the wood screws. I forgot to get a photo of this step, but you can check out this post, to get a better idea if needed.
- Give your sign a final sanding to rough up any edges and distress some of the paint if you would like. My paint was still actually wet when I took these photos, so I did rough it up a bit more once everything had dried. The life of a blogger! 🙂
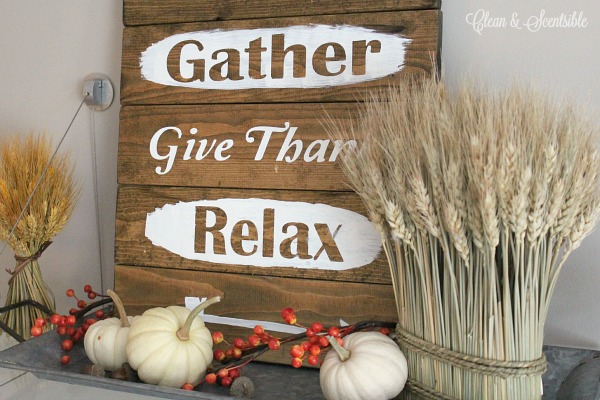
Before you leave, be sure to check out all of the lovely ideas shared below. Happy fall!
Shades of Blue Interiors | Thoughts from Alice | Clean and Scentsible
Craftberry Bush | The Chronicles of Home | Rooms for Rent
Finding Silver Pennies | Town and Country Living | City Farmhouse
Absolutely beautiful Jenn!!! Pinned!
How pretty! The whole vignette 🙂
Such a cute sign Jen! Love the little helpful tips that you added to make this so much more than a simple planked sign. Love it!
I hope you had a fantastic Thanksgiving! xx Your sign is so lovely. I have a silhouette upstairs but haven’t tried stencils yet with them. I think I need to try this now. xx
Love your thankful sign, Jennifer! Your vignette is really pretty, too.
What a cute sign Jenn! I have been going sign crazy lately and love this one 🙂 Thanks for linking it up at the Bewitchin’ Projects Block party this past week. Hugs, Lisa
Love your rustic sign! What a wonderful sign for not only Thanksgiving, but anytime.
Thanks Linda! Yes, I guess we could leave it up after Thanksgiving!
So cute! I really like the affect of the postitive and negative paint/stencil treatments and I’m a sucker for a nice wooden sign. Thanks for sharing with us at the #HomeMattersParty link party.