Hey guys! It’s time for another 10 Minute Decorating post. This month we have lots of quick and simple ways to help you decorate your home for Christmas. You can find all of the projects at the end of the post, so be sure to check them out!
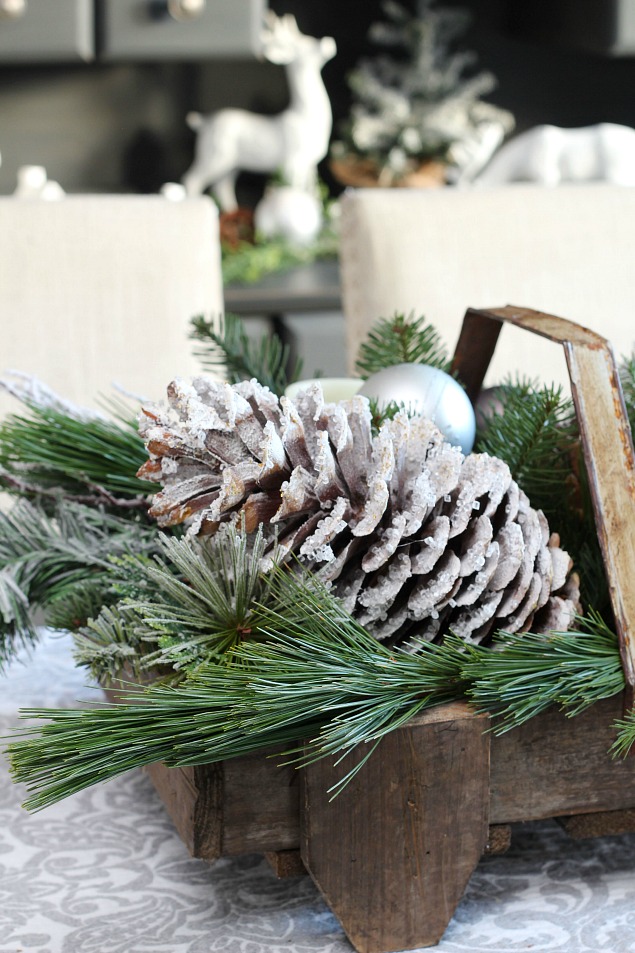
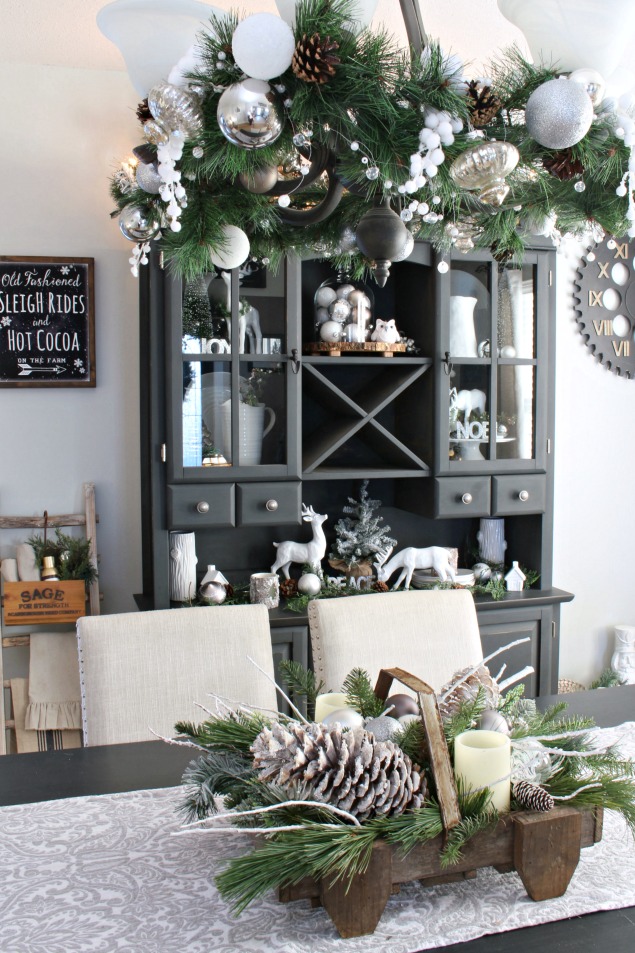
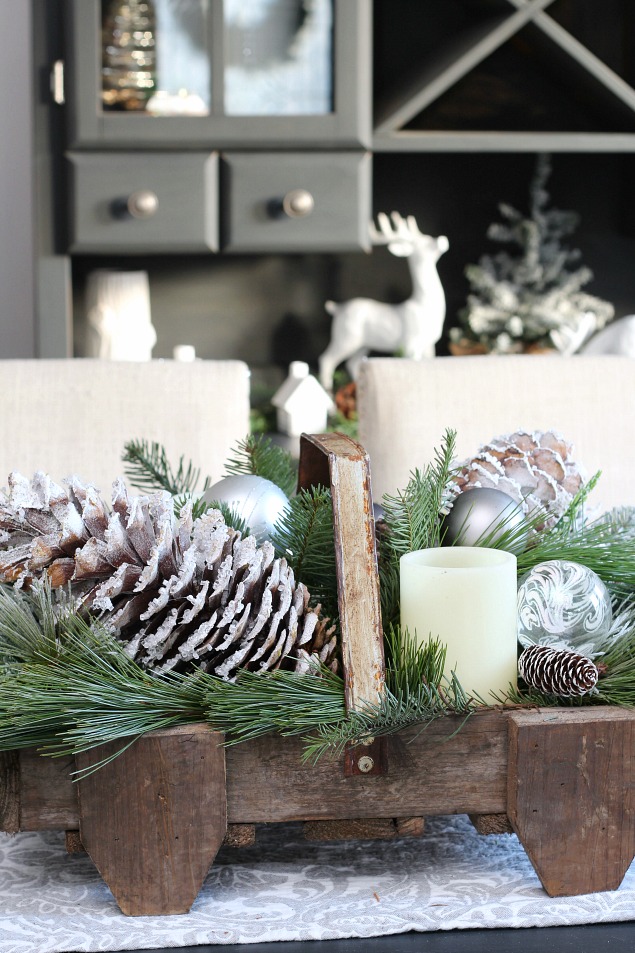
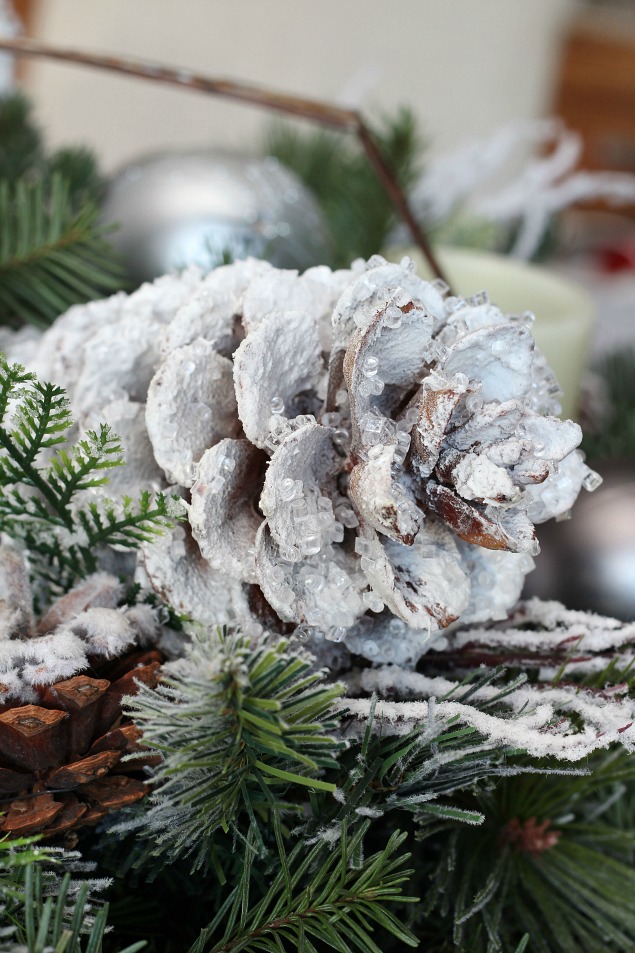
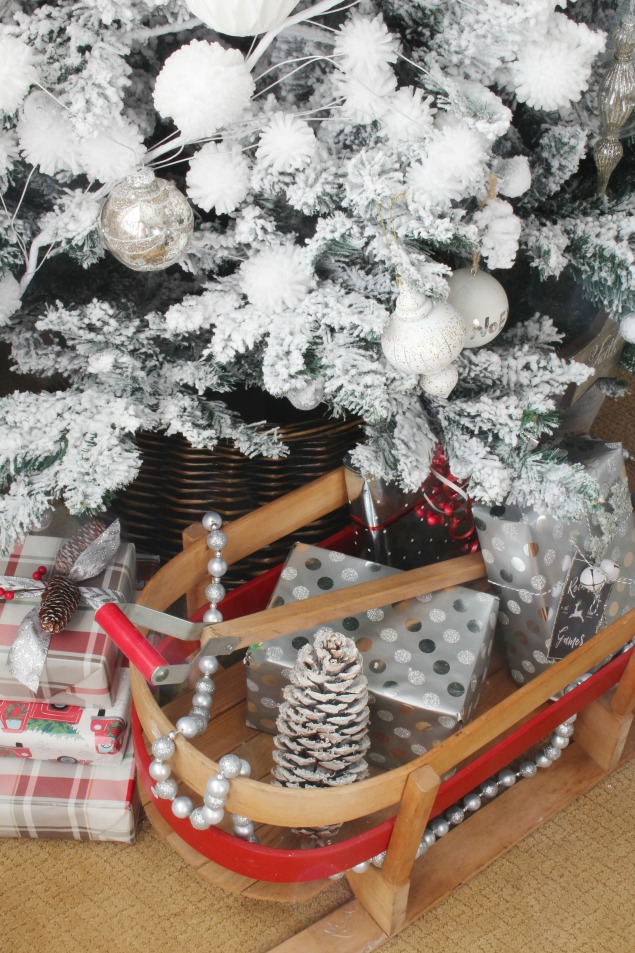
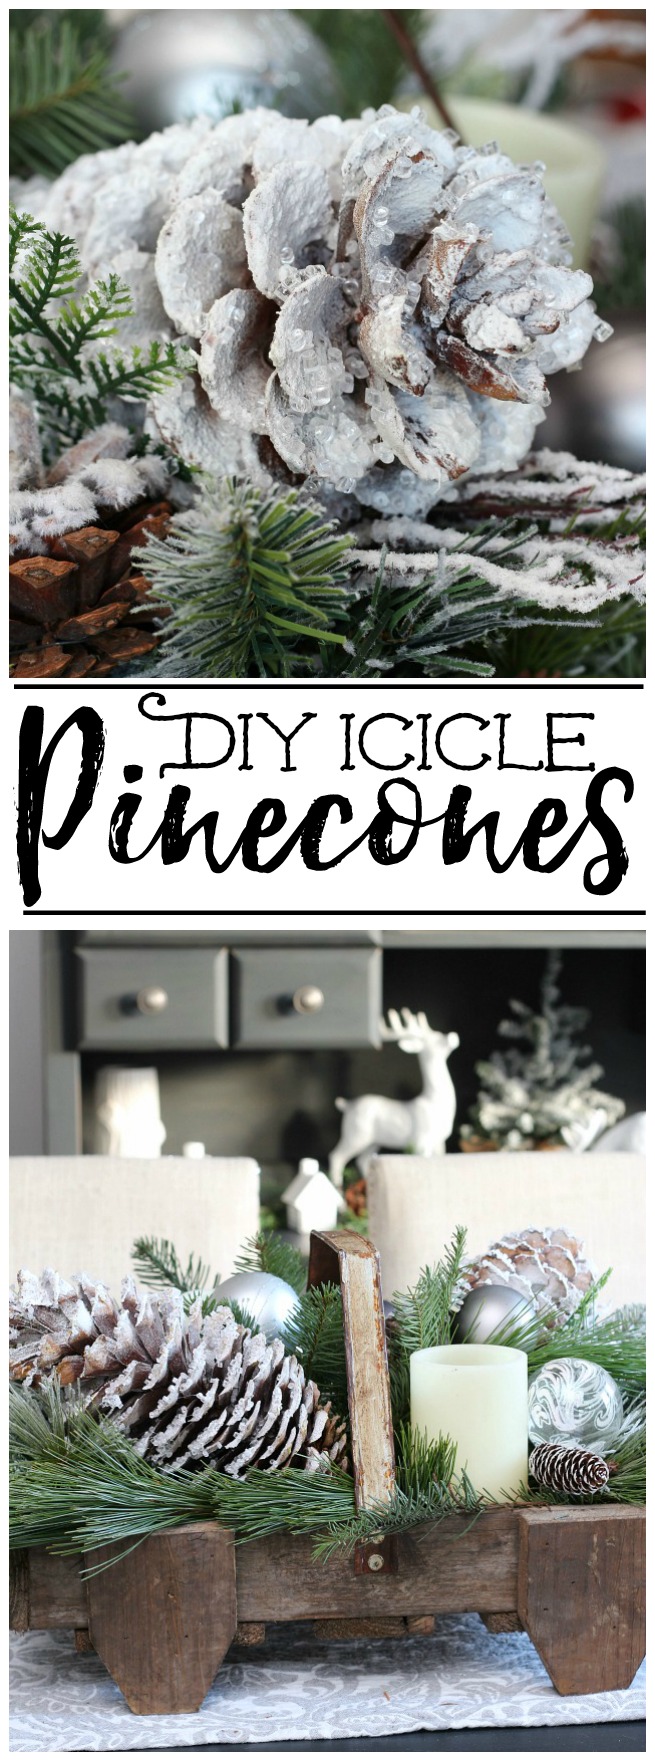
I have a really easy tutorial for you today to add a little winter into your Christmas decor. If you saw our Christmas dining room yesterday, you may have seen my DIY icicle pinecones popping up here and there. I used them as part of our centerpiece on our dining room table as well as in our hutch and on the sled under the tree.
I love the glittery sparkle of little icicles as the sun hits them and these icicle pinecones will give you a similar effect. Other than drying time, they only take a few minutes to make and you can easily make up a big batch at one time. They’re perfect to add into your Christmas decor – use them in centrepieces, on trees, or on any snowy vignette that you create. They’re especially pretty if they’re used with Christmas lights.
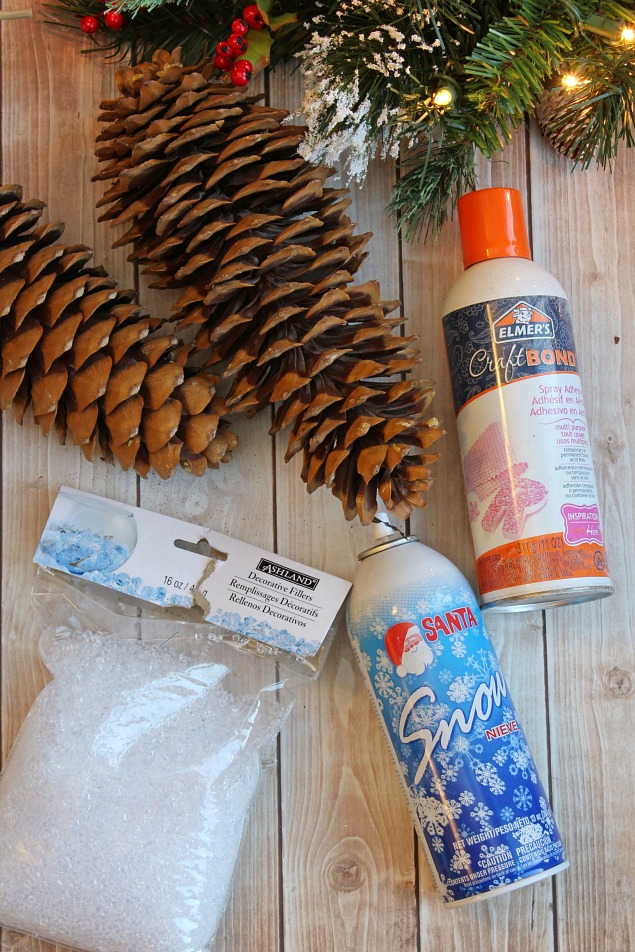
MATERIALS
- pinecones
- spray snow or white paint
- spray adhesive
- crystal vase filler {I purchased mine at Michaels}
- glitter {optional}
INSTRUCTIONS
- Spray your pinecone with the spray snow or paint on as much “snow” as you would like with some white paint. You can just add some to the tips for a light snow or cover your pinecone a little more thoroughly. I gave mine a pretty good covering. Allow to dry.
- Working in sections, spray the pinecone with spray adhesive and sprinkle on the vase filler. Gently shake off any excess. For a little extra sparkle, you can also add some glitter if you would like. Be sure that your workspace is well covered as the spray adhesive can actually spray further than you think. I also used a paper plate under the pinecones when adding the vase filler to catch anything that didn’t stick to the pinecones. You can then reuse this later.
- Allow your pinecones to dry and add them to your Christmas decor!
I hope you enjoy!
If you’re looking for more Christmas DIY projects, you may like these posts…
Rustic Popsicle Stick Sled Ornaments

Christmas Chalkboard Inspiration
Hot Chocolate Bar with Free Printables
I love the sparkle! Such a great idea to add the crystals!! Merry Christmas!!
Thanks so much Susan! Merry Christmas to you too! xo
I love these!!! I might just have to add some glitter to mine 🙂
You can never have enough glitter at Christmas! Loved your snowy version too!
Great DIY for this season. Stopping by from the Share the Wealth party.
This is such a fun idea! I like the entire centrepiece. I hope you will stop by to share it with us at The Crafty Corner link party 🙂
Those are so pretty… and so easy! Thanks for the idea and the quick tutorial. Pinned.
I love, Love, LOVE this idea! I want to do these for next Christmas!
Thanks for sharing this with us at Funtastic Friday Blog Hop!
Thanks Debra! A little early Christmas planning is always good, right? lol!
So cute!! It’s awesome! I love the little sled too. What a great addition to your Christmas-themed table.
I purchased some flocking snow that is slightly different from yours here because it’s all I can find. Even after allowing it to sit and dry for hours it crumbles and cracks on the pinecone before I can get to the other steps. Any ideas?
Are there instructions on the snow flocking packaging? The spray snow is a lot different from snow flocking. Generally with the flocking you wet the surface, sprinkle on the flocking, and then spray the surface again with water to set it. That may be why it’s cracking? I hope that works for you!
I’m making Christmas evergreen wreaths this year and these would look gorgeous on them. I’ve already forged bags of pine cones and want to add faux snow to them but this idea is even better! BUT I wonder if they would hold up outside in the elements? Have you tried this and what are your thoughts?
If it’s covered outside, it should be fine. I don’t think it would hold up if it was directly out in the rain or snow. This looks really pretty with flocking too if you want to combine it with your faux snow.
I checked Michael’s and hobby lobby for the base filler and they don’t even know what I’m talking about I’ve got some that I bought a couple of years before but it’s at my cabin in North Carolina I’m sick I just I’m in Florida and I want to do the do this so if you have any ideas where I can buy this please let me know
Thank you Sandy Crabtree
There are lots of options on Amazon. You can search crushed clear crystals or crystal vase filler. Just watch the size – I like the smaller sizes better (less than 4mm) but depending on your project, you could go bigger. Here’s one option…
https://amzn.to/3kHeh1L
Thanks Jenn I ordered the one here suggested again thank you so very much Sandy Crabtree