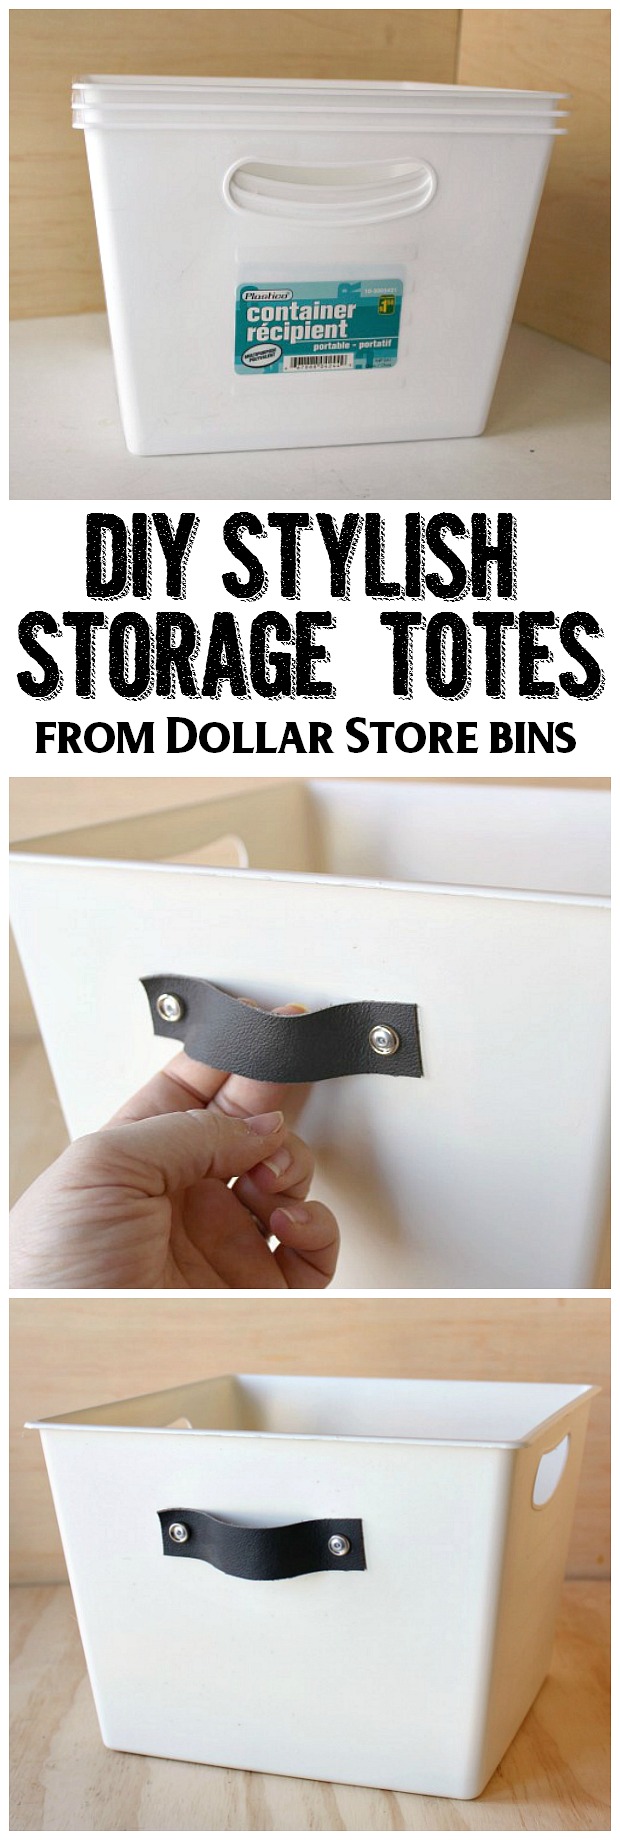
Hey! It’s Lindi here! I’m so happy to be back again from Love Create Celebrate sharing another DIY project – stylish DIY storage totes.
I am constantly looking for new ways to add beautiful storage to my home and keep myself organized, but I can’t always find what I’m looking for. So I found some dollar store containers and beautified them myself.
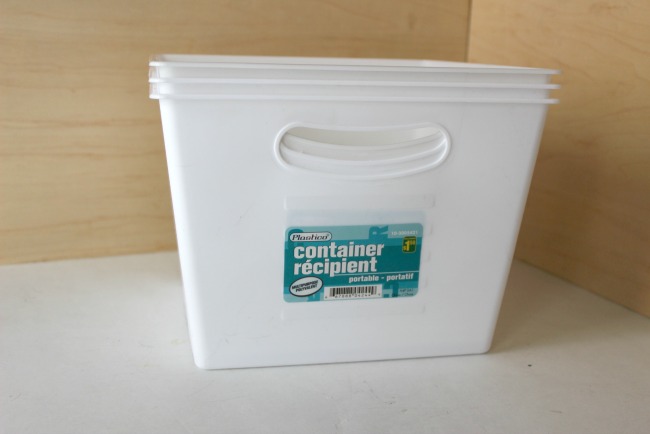
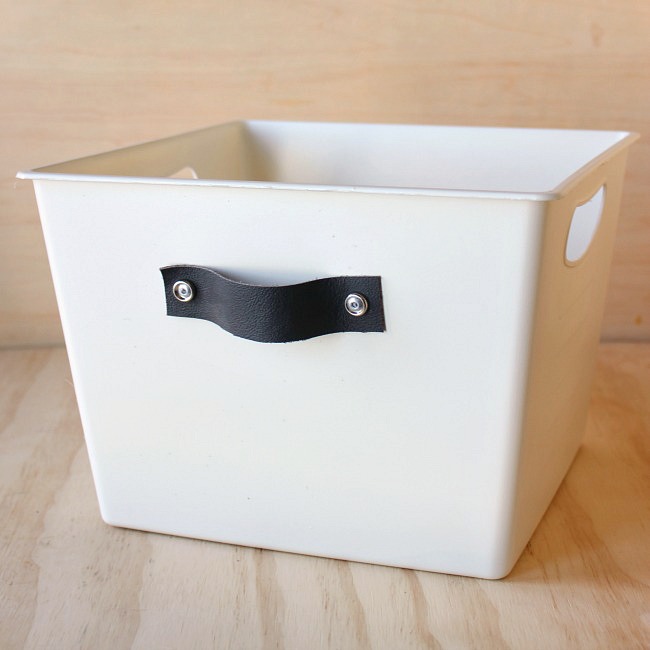
I saw these bins at the dollar store and knew they would fit perfectly inside my cupboards, I just wanted to make them look a little prettier. I decided to spray paint them and add new leather handles.
Materials:
Dollar store bins
Spray Paint
Leather (or faux leather) scraps
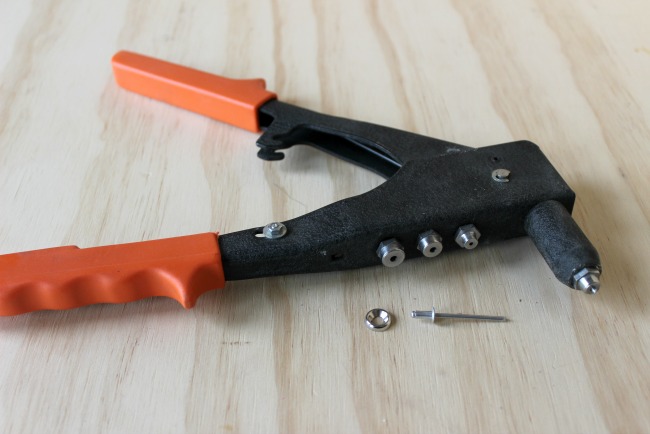
Leather punch
Rivets
Finishing washers
Rivet gun
Drill
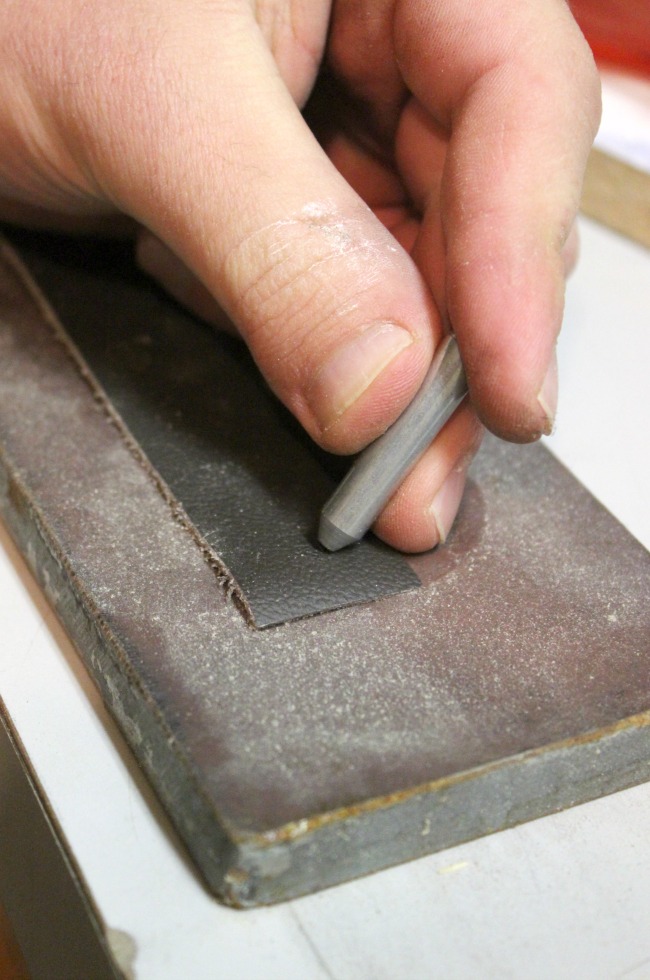
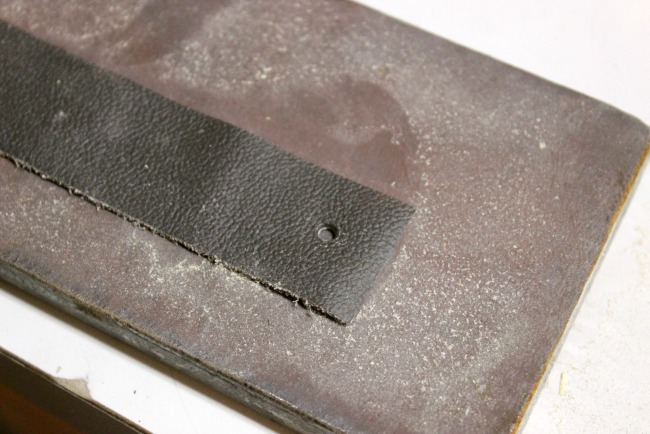
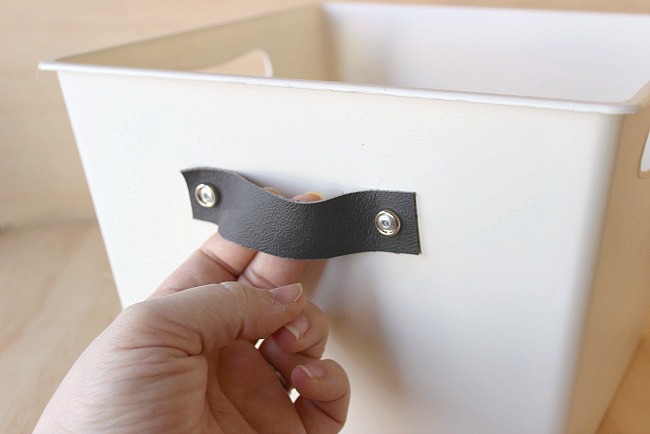
Start by cutting your leather for handles. I cut my pieces into 1″ by 5″ strips. Then, using your leather punch, add holes onto each side of the leather strip, where you want your rivet to sit.
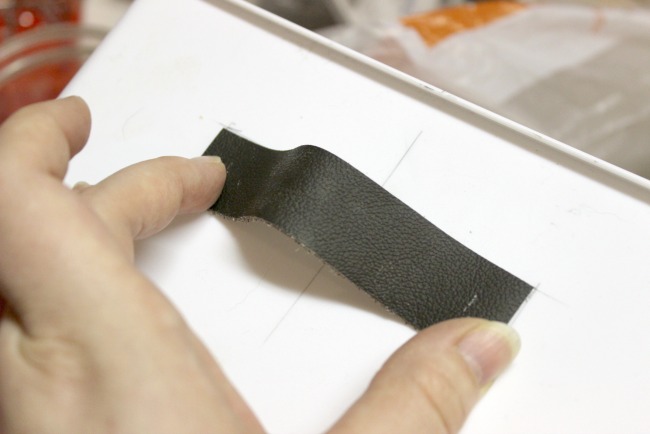
Next, find the center point on your bin and line up your leather strip so that it sits where you want it. Mark those spots.

You can draw right on your bin because you will spray paint over it in a few minutes. Using the marks you drew, mark the center spots that line up with your rivet holes on the leather.
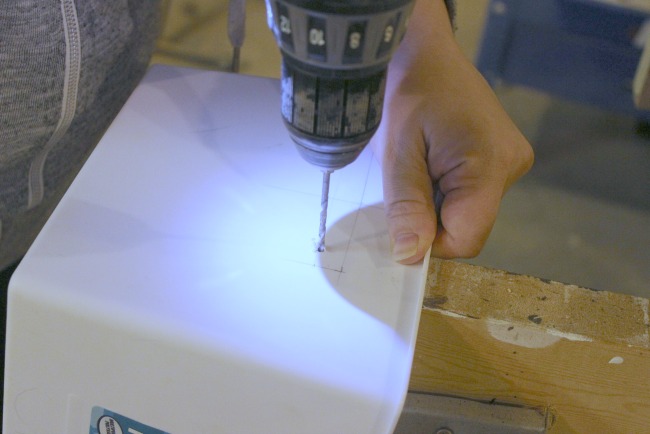
Using your drill, drill a small hole into the plastic bin, where the rivets will slide in.
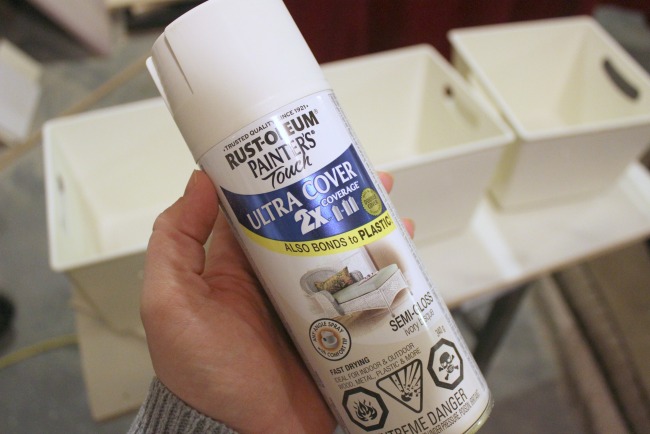
Once all of your holes are ready, spray paint your bins whatever colour you choose! I chose Ivory, because I wanted them to be slightly off-white.
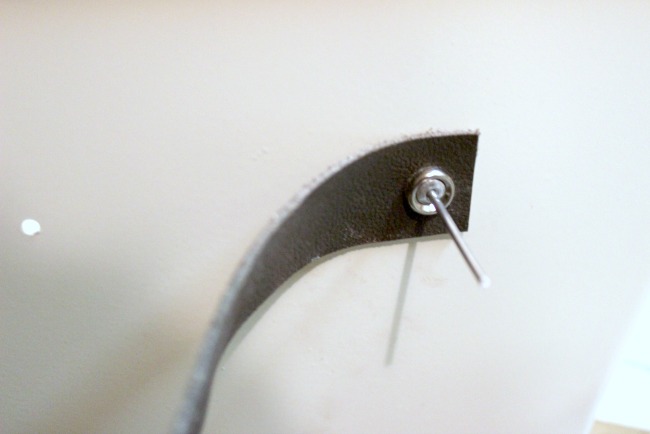
Now you add your rivets. I used 1/8″ rivets for this project, and finishing washers of the same size. It is SO easy to add these rivets and I made a quick YouTube video to show you how I made it!
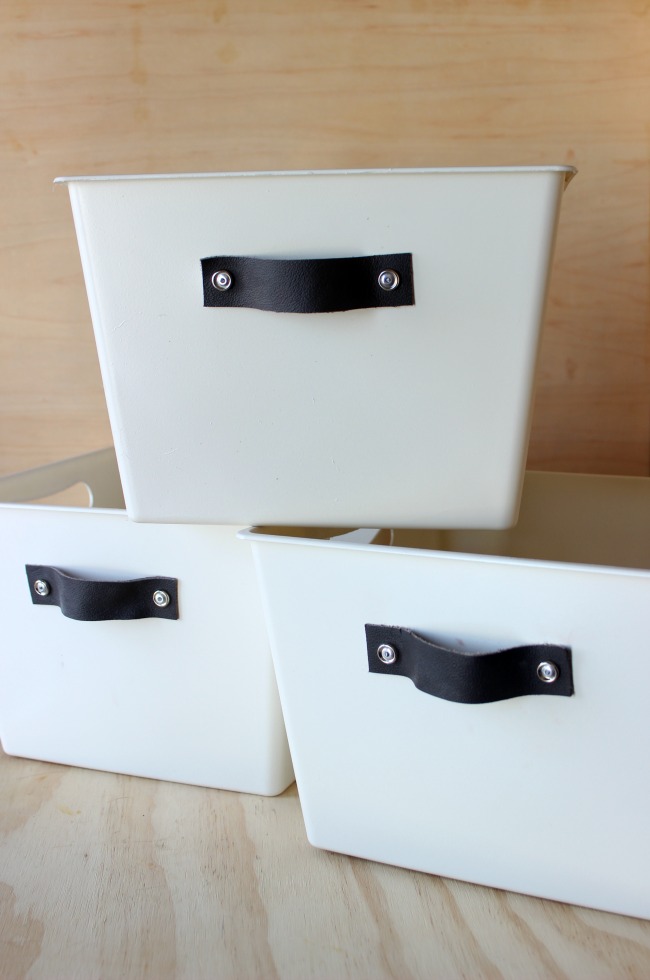
I’m SO happy with my new storage bins! I turned these $1 items into bins that I’m happy to display on any shelf in my home.

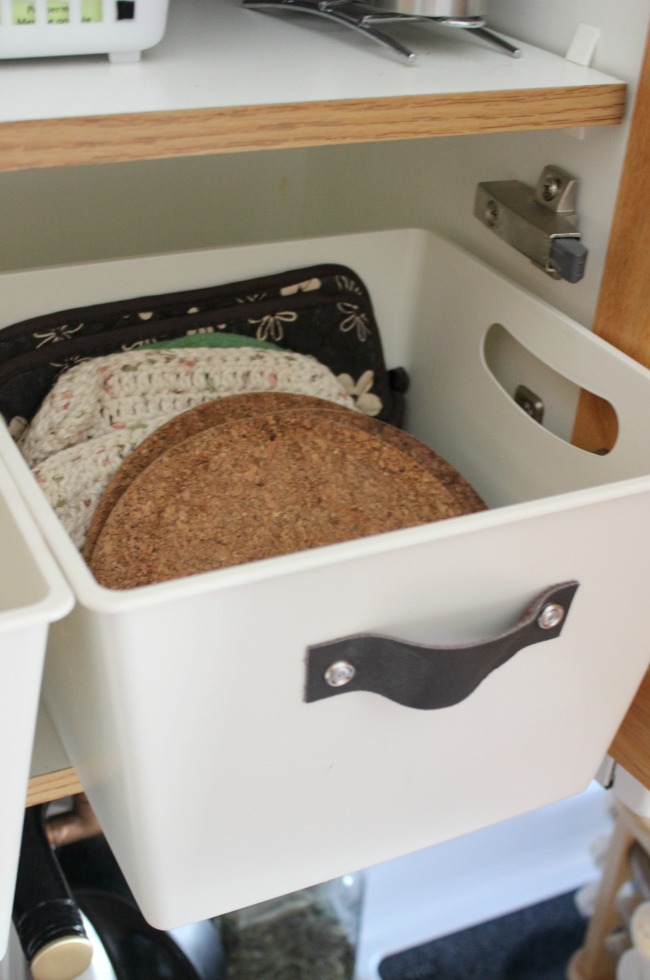
Right now, they are sitting perfectly in my kitchen cupboards, but I may move them over to my linen closet or daughter’s bedroom. Or I may just have to make a few more! Hope you enjoyed the tutorial!
For more DIY home decor inspiration visit me at Love Create Celebrate. I’d LOVE to see you there! Or you can follow me on Pinterest, YouTube, or Facebook!
Thanks for having me here today Jenn!
For more DIY storage ideas, check out these posts…
It’s amazing how one little detail can completely change the look of a piece. Your storage totes look great!
Thank you SO much! xo
Wow! I have seen those containers but it have never came to my mind that I can beautify them in this way. i am going to buy a few one. My kids will love them.I can allow them to put stickers on them. I will definitely organize their toys and consequently my home 🙂 Thanks for sharing this tutorial
Thanks Lora! SO glad you loved the tutorial!
please explain the finishing washer; the video doesn’t show it and you don’t show a picture of that part of the installation.
Great question! Sorry about that Laura! The finishing washer is not something you need To use. I just think it looks prettier with the rivets. You just slide it onto the rivet (on the leather side) before you use the rivet tool.
Here’s a link to one: http://www.homedepot.com/p/Crown-Bolt-10-Nickel-Plated-Finishing-Washer-100-Pieces-20692/202249744?MERCH=REC-_-PIPHorizontal1_rr-_-100337761-_-202249744-_-N
This is an awesome idea, I love it. Pinned!
Thanks for pinning! 🙂
What an awesome idea!! So affordable yet so cute! I will def be making these!! Thanks a bushel for sharing!
I hope you’re able to make them!
Such a clever and useful post, Lindi! I love the bit of leather touch to this bin, and the fact that it came out of the dollar store makes it that much more enticing to make. Thanks for sharing this useful DIY on #shinebloghop today. So glad you were able to join us this week 🙂
What a cute idea! Such a great way to add a storage solution. Thanks for linking up with us!
Thanks for hosting! 🙂
Great idea, they look awesome!
Yes! Lindi did a great job on them!
Cute idea! I love how they came out.
I think I need to make some too!
Fantastic! Thanks for sharing on craft schooling Sunday (last week) am just now looking for features, and this is one!
Love the addition of leather straps to those totes. Looks like you have spent a lot for a tote. Thank you for sharing with us at #HomeMattersParty . We would love to have you again next week.
What a great idea! I love any project where I get to use a drill!
How clever is this?! Thanks so much for sharing. Looks like I’m headed to the dollar store soon. I bet this will be super cute with metallic leather too.
That’s a fun idea!
So cute Jenn! I recently just bought storage totes for all of my toddler’s clothes. Wish I read this article a few days earlier. 🙂 So cute! You should glue a little chalk board on the same side as the handle so it’ll be easy to write a label on it! 🙂
Chalkboard does always make things cuter! 😉
We have Dollar tree and Dollar General near me, but not the dollar store. Which of these stores did you purchase them? Thanks!
I think she was just referring to the dollar store in general terms. Either of those options will likely have similar products. 🙂