Does anyone know where this week has gone? Things have been so busy this week I haven’t had a second to post! I have been meaning to get Connor’s Halloween party invitations up for about 2 weeks now. Better late than never though, right?
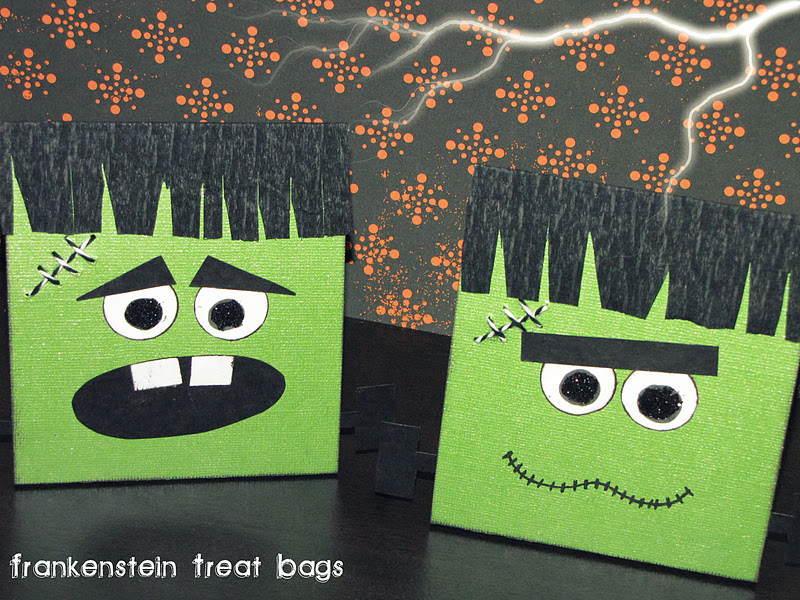
Remember the Frankenstein Treat Bags that I was making for Matthew’s class?
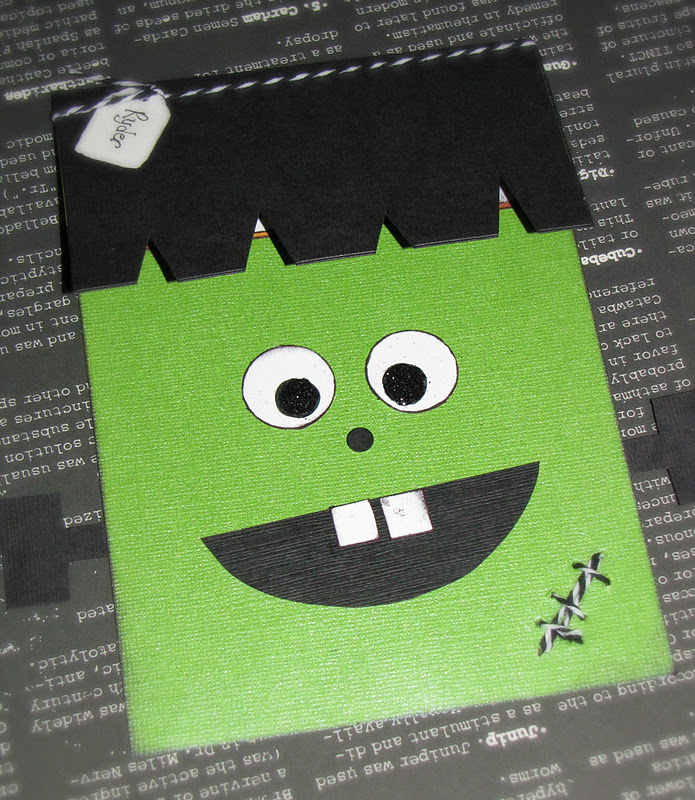
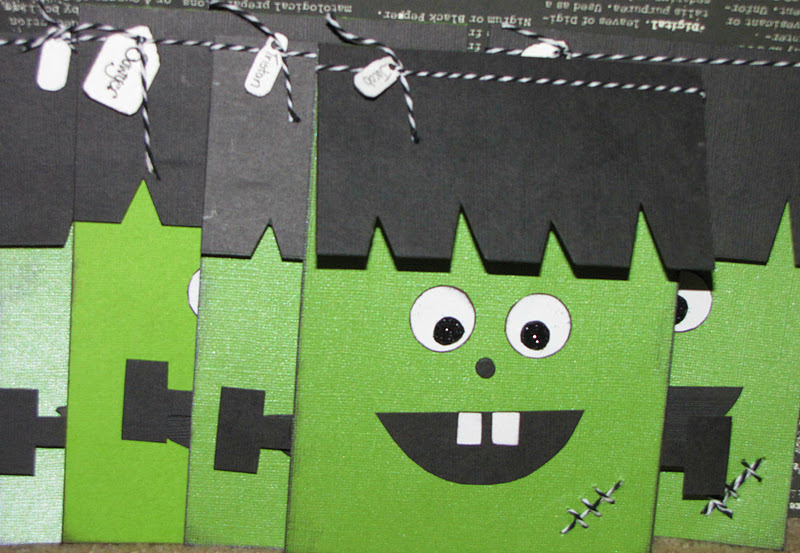
Well… I still had a bunch of materials left over so I decided to make some Frankenstein invites too.
Materials
- green, black, white, and orange cardstock
- black baker’s twine
- black glitter
- circle punch or circle Coluzzle
- paper scorer
- black pen or Sharpie
- black ink
- clear drying glue
- pop dots
Directions
- Cut a piece of green cardstock 5 inches x 9 inches. Score at 7 inches. Ink your edges with black ink.
- Cut 2 pieces of black cardstock 5 inches x 3 inches. Place the 2 pieces together and cut small triangles in the bottom for hair {3-4 triangles}. Make sure that they do not go up more than 3/4 inches.
- Glue your black pieces on either side of the short green flap.
- Cut circles for the eyes from the white cardstock {I used the smallest circle on my Coluzzle}. Ink the edges with black ink. Using a black Sharpie draw smaller circles for the insides of the eyes. Cover the black section with glue and add black glitter.
- Use a small hole punch and punch a circle for the nose. Attach with a small pop dot.
- Cut out a shape for the mouth from the black cardstock. I added little teeth to mine as well. Cut out the bolt ears and glue to the back of the invite.
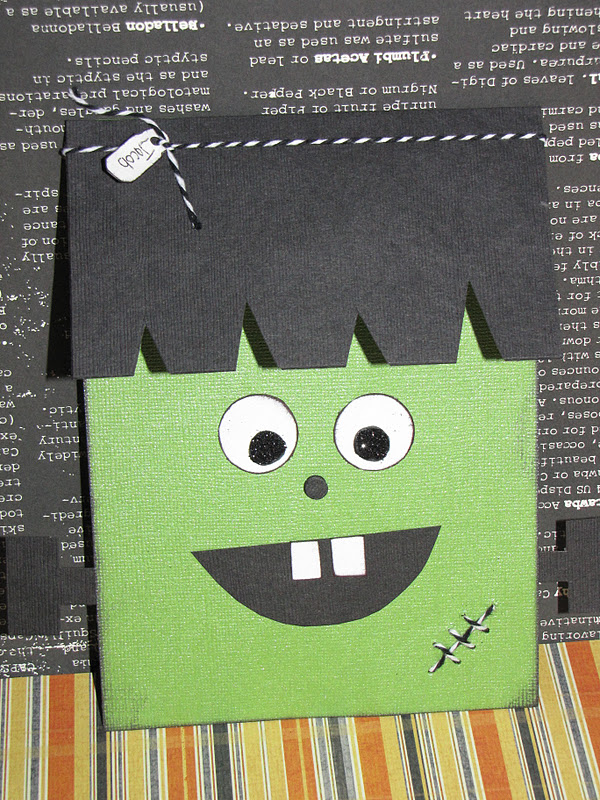
- Using the baker’s twine, add some stitching.
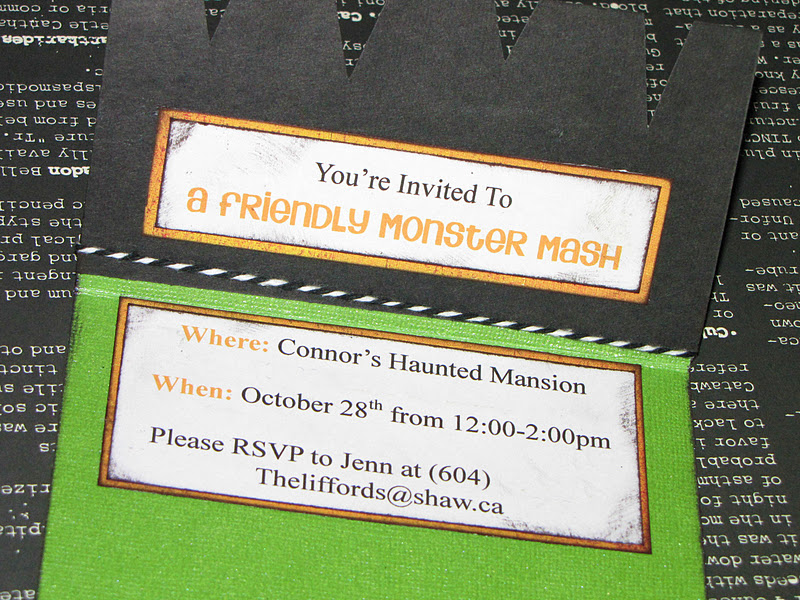
- Write up your invitation on a word processing program and print out. The top section needs to be less than 1.5 inches and the bottom section needs to be less than approximately 2 inches. Cut out and ink the edges. Mount on orange cardstock. Glue to the invite.
- Add some baker’s twine and a little tag to the top of the card for the child’s name.
And now it’s time to PARTY!!!
Want to stay connected? You can follow along with me here…


The invites are really cute!
Those are adorable