
- canvas
- black and white paint
- paint brush or sponge brush
- sanding paper
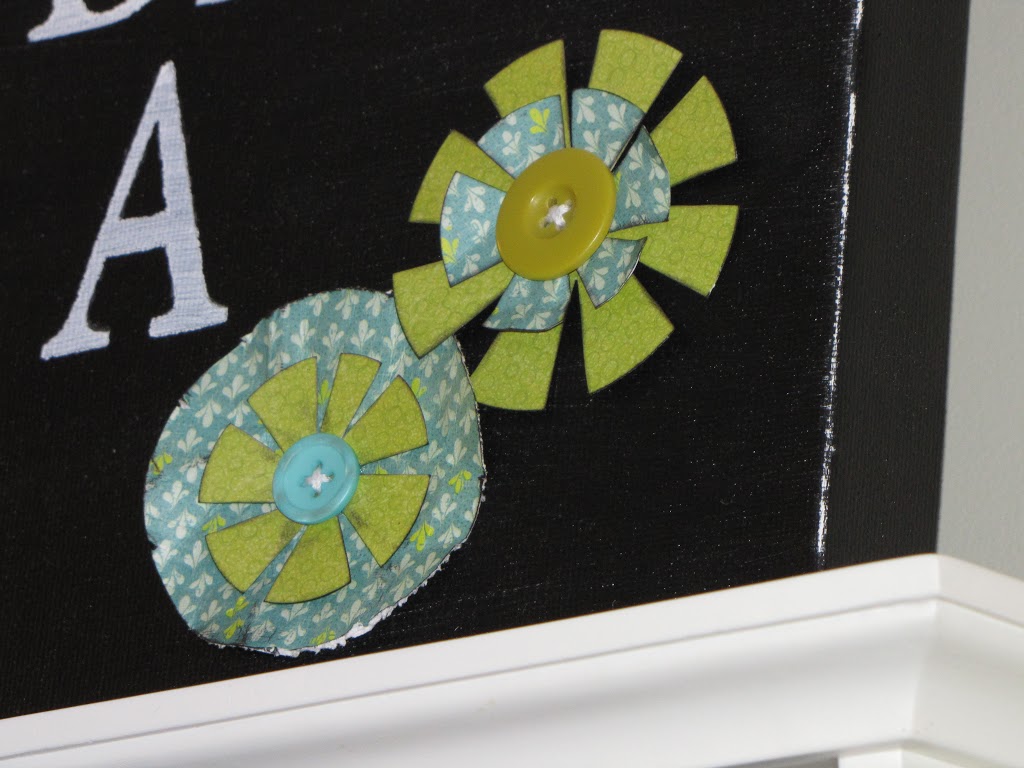
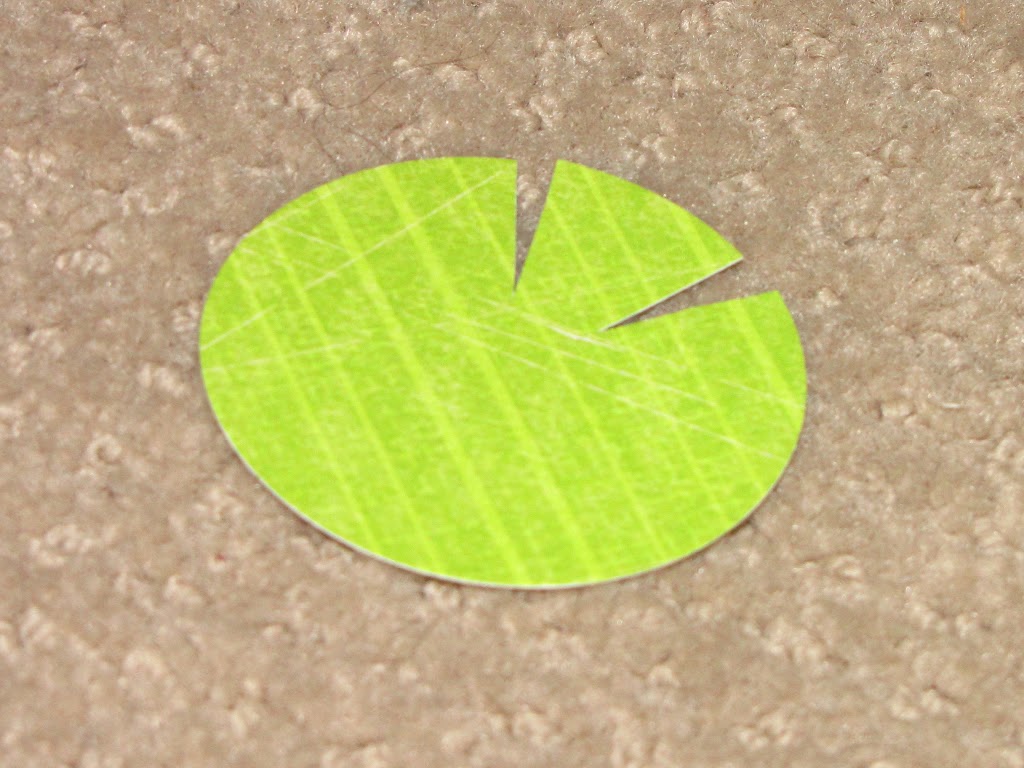
- scrapbook paper (2 coordinating papers)
- black ink
- 2 and 3 inch circle punches for the flowers (or draw your own circles)
- 2 buttons
- vinyl or stencils
- glue or double sided tape
- Paint your canvas black.

- Cut out your vinyl saying on the Silhouette and, using the negative space, adhere it to your canvas. Make sure that the edges of the letters are pressed down firmly. If you don’t have access a vinyl cutter, you could use letter stencils.
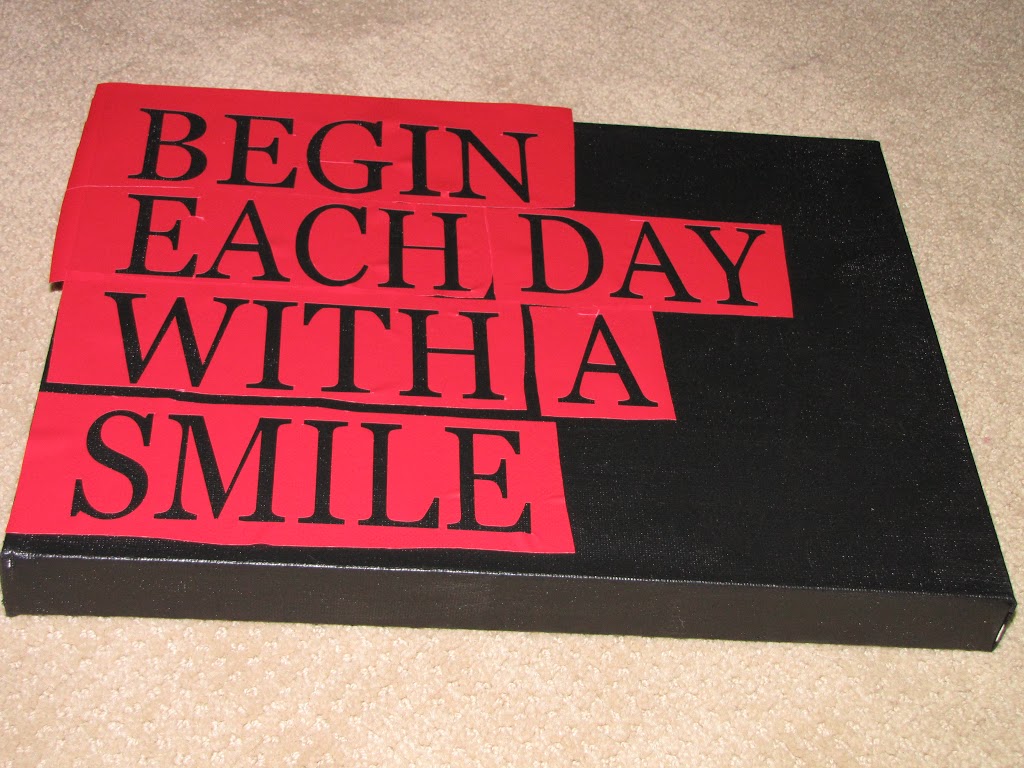
- Paint over the vinyl letters with white paint. I did 2 coats of paint on mine. You could use more if you wanted more of a solid white colour. I liked having a little bit of the black showing through.

- Once the paint is dry, peel away the vinyl. You can use a black sharpie to touch up any areas that the paint has bled through or if you would like the edges of your letters to be a little sharper.
- Sand over the front of the canvas and along the edges.


This sign looks great, thanks for sharing a fab tutorial! I’m still trying to get some signs done to put up around my home, so much inspiration around!
Adorable!! I love the flower you made too. It turned out really great!!
xoxo
Jen
Love it! I just ordered a Silhouette machine so I can’t wait to use it for projects like these!
Hi! I found you on Craft-O-Maniac’s blog hop, and am now following. I love this sign. Thanks for sharing the tutorial. I’m looking forward to reading more of your posts. 🙂
Jan
What a cute idea. I really need to get some St Patty’s day crafts together. Don’t forget to join me for More The Merrier Monday and link up all of your great projects.
http://diyhshp.blogspot.com
Love this! I love working with canvas do all kinds of fun things 🙂 Thanks for the tutorial!
http://www.youngnester.blogspot.com
Very cheerful! Thanks for sharing your tutorial!
very cute! I love how you did the lettering. I have some canvas’ I need to do something with and this gives me some ideas. Thanks for sharing!
Simply Darling! I love every detail!
You did such a great job!
-emily
http://www.nestnestingnested.blogspot.com
Super job!!
So pretty, Jenn! I love it!
Thanks so much for sharing in the DIY Project Parade!
Roeshel
I’ve given you an award! Check it out if you’d like!!
Busy B Family
Adorable project! I will have to try this sometime! I am visiting from Today’s Creative Blog and I am a new follower!
Have a great day!
Michelle
http://www.delicateconstruction.blogspot.com
Very nice, a great reminder for the start of every day!
soooo cute! It would totally make me smile to see that everyday 🙂 Great job!
Thanks so much for linking to “20 Below Thursday”! 🙂
I love it. Great job.
Super cute! Hugs, Bobbi Jo
I’m visiting you from the Creative Girl BlogHop! You have some awesome ideas on here! I love this sign! I can’t wait to look aroudn some more. I am your newest follower!
Too Cute!!
Very cute and clever idea! Thanks for the great tutorial on this super sign! 🙂
xoxo laurie
You have been featured at CraftOManiac. YA-HOO! Thanks a bunch. winks-jen
very cute! i have never seen canvas at the dollar store before – i’m definitely going to be on the lookout!
Words to live by! Love your creativity, thanks for linking your great projects to my blog bash K.I.S.S. @ The Tattered Tag. Please link up more of your great ideas tomorrow. 🙂
Drop by The Tattered Tag
Love it! I have a canvas I got for a great price, but haven’t done anything with it yet. Thanks for the great idea and directions.
Buffie
http://scrappingwithbuffie.blogspot.com/
What a smart way to do it! Love using the vinyl as a stencil instead of trying to stick on each one of those letters. Thanks for sharing!
Wow that looks great! Love the tutorial too! Very nice!
love this! wonderful statement & the way you did it is so smart.
on another note…the thing you used around the edges & that sharpen scissors…my grandma had a similar tool years ago. i’ve been looking for something like it for years…seriously.
going to see if i can order one.
thanks for linking up to the SPRING FLING!
kellie
This is sooo very cute!! You did a great job! Love it!
Thanks for linking last week! I featured this on this week’s party. Come check out your feature, grab a button, and link again.
Thanks, I love it!
Wendy
Super adorable!!! The colors you chose just make the sign “pop”! Thanks for linking up to Thrilling Thursday @ Paisley Passions. I hope you stop by again soon 🙂
~Lori @ Paisley Passions
Thanyou for this fantastic tutorial i love your blog and have followed you for awhile but only recently started blogging myself. I have been inspired and had ago at making some and put a link back to your tutorial on my blog.
cat xx