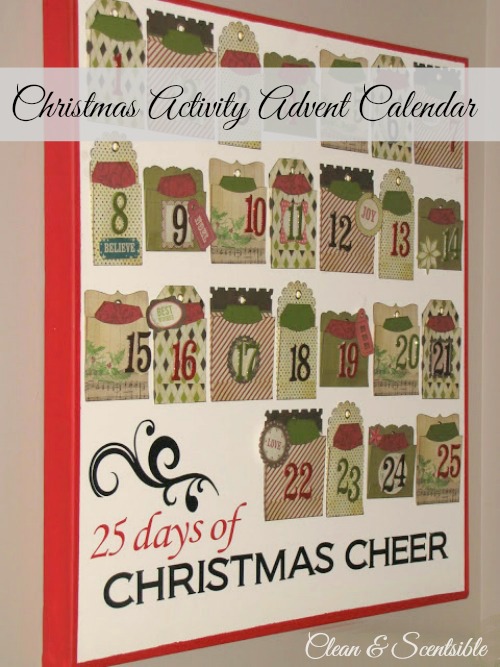
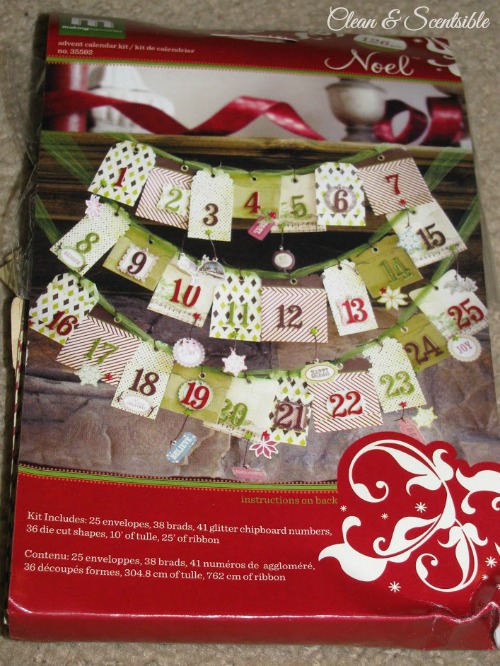
There were so many cute ideas for advent calendars out there, it was hard to decide what to do!On one of my many shopping trips, I found this Making Memories advent calendar kit at a local scrapbook store.
I loved all of the different papers and envelope shapes but didn’t really like the banner style that it was designed as. So…I bought a large 24×24 canvas and decided to mount all of the envelopes on there instead!

Like all of the projects that I have been doing lately, this should have been a fairly quick project. That being said, it ended up taking FOREVER!!! When it comes to projects, I am not particularly patient, and I have had huge issues with actually finishing projects lately. Please don’t let this stop you from doing a similar project though – I promise you it is really easy!!
MATERIALS
- 24×24 canvas
- cream and red paint
- painter’s tape if you would like to do edging on the front of the canvas
- Making Memories Advent Calendar or any other numbered envelopes or pockets
- glue {I like Quick Grip} or other strong glue to adhere the envelopes to the canvas.
HOW TO
WARNING: This is a rather long set of instructions. Learn from my mistakes, and it should not take multiple days to complete!
Day 1 – I started off by painting the canvas cream. This should be a very easy task but I had a very curious cat that was not happy about his lack of attention. Grey hair and cream paint do not mix well. Had lots of fun picking off hair and re-painting. Time for a break.
Day 2 – I wanted to paint the border of the canvas red. I don’t know if it is just me, but I find red a very difficult colour to work with. I just can’t seem to get the right shade. Three different paint colours later (and four coats of that paint!) it was done. Break.
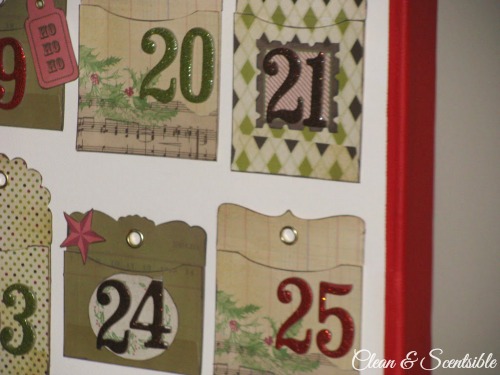
Day 3 – I layed out all of the envelopes on the canvas and figured out where I wanted everything to go. I inked the edges of all of the envelopes and embellishments {I have to ink everything!} and glued the numbers on. About half way through gluing the envelopes to the canvas, I ran out of my Quick Grip glue. I must say that I LOVE this glue. It pretty much glues anything and, as the name says, bonds very quickly. Well, I ended up using some other glue to finish up but it definitely did not work as well. Lots of time spent pressing and holding things down to dry. Okay, time for a break.
Day 4 – Will this project ever be finished???? After my envelopes were glued on, I thought that the canvas looked too plain and decided to paint a red border around the edge on the front of the canvas (I had just painted the sides on Day 2). For some reason, my brain did not think back to my red problem two days earlier. I tried to free hand the edging but this did not work well for multiple coats. I will not go in to how long this took me but I ended up using painter’s tape (which I should have done to begin with) for a thin outline around the front of the canvas. Break time.
Day 5 – By this point, I really just wanted this project DONE. All that was left to do was the vinyl. As excited as I was to receive my Silhouette last week, I have not really used it yet for two reasons:
- I have spent all of my free time painting canvases.
- I really, really hate reading manuals.
Well, I am happy to report that this was the easiest part of the whole process. There a few things that I would have done differently, but not bad for a first try. Vinyl applied. Project done!!!
If you would like to try your own Advent Calendar, keep your cats out of sight, use painter’s tape for the edging (and paint all the red at one time!), and make sure you have some good glue. It should then be a fairly easy project to whip up!
Happy Holidays!!
Very cute! I like your creative twist.
It turned out great! Well worth the effort!
Thanks for linking up to Free for All!
Hannah @ http://youngancrafty.blogspot.com/
New Year and Christmas – We have collected a huge number of New Year’s and Christmas greetings and wishes, jokes and pranks, reciepes and gifts, and many other miscellaneous ideas that will help you to prepare for the Christmas and New Year holiday and make it original and memorable.
http://www.2011-year.com
How cute! I’ve been wanting to make an advent calendar for a while now. You’ve inspired me!
LOL!! Although all your indicated breaks tell me this is something I ought to stay away from, the outcome is gorgeous! This is the prettiest advent calendar I’ve ever seen. 🙂
Donna
http://funkyjunkinteriors.blogspot.com/
I love how you chose to put it together, it’s really nice. 🙂
Cute! Thanks for linking up to Mad Skills Monday!
Oh no you didn’t. Another great project, but I can’t believe it took a week to make, yikes. Maybe I’ll stick with the towels, lol.
Either way, you know what to do with this project right???
Hope to see more from you,
Bella 🙂
Oh, I like yours soooo much better! I’ve always wanted to do an advent calendar. You have inspired me!
Super cute! Especially love the title! Thanks for linking this up to Scrappy Saturdays!
So cute! What does inking the edges mean? I think I may have to just make this with my family! 🙂 PS RockMeBaby Records is open to Canadian entries too!! Thanks for guest posting!!
Hi Emily,
Inking means to take an ink pad to the border of the papers. It just makes the edges stand out a bit more. Hope that helps! 🙂
this turned out great!!
Awesome project! And I love seeing TOM mentioned! We must not live very far apart!
I love that you did this on canvas!!!
What a great calendar!!!
=)
ha ha you can ignore my request for the tutorial as I’ve found it!
Great toys for Black Friday Toys. Your blog’s great. Thanks
It turned out beautifully! My plan is to make something similar in the next few weeks. Guess I should start now rather than later in case I run into hiccups (and I usually do). Lovely!
I love this!!!
It turned out really well! I love the red striped around the edge….worth all that work! 😉 The kids will love it!